Showing posts with label Scrapbooking. Show all posts

Friday, 27 June 2025

Simple layout

Hello there,
Welcome to my blog and follow my work on social media. 

Today’s project is all about proving that a scrapbook layout can be both stunning and incredibly simple to put together. I call this my "Simple Layout," and it's built around vibrant rainbow colors and a clean aesthetic.

For this project, I turned to my trusty stamps and dies from Pinkfresh Studio to bring the cheerful color palette to life.

1. The Custom Rainbow Background
Instead of messy ink blending, I took a more streamlined approach to the main background element.
 * Digital Design: I first worked out the unique, fan-like shape of the rainbow background digitally. This allowed me to perfectly plan the shape before committing to paper.
 * Printing & Texture: After printing the custom rainbow design, I added subtle dimension by incorporating score lines. This simple scoring adds fantastic texture and makes the paper catch the light beautifully, giving it a handcrafted touch even though it was digitally created.


2. A Touch of Vellum Elegance
To add delicate detail and break up some of the bright color, I used a piece of vellum. Vellum is perfect for adding layers without adding visual weight.
 * White Heat Embossing: I stamped sentiments or small details onto the vellum and used white heat embossing. The crisp white against the translucent vellum adds a beautiful, sophisticated element that really pops.


3. The Focal Point
The layout was finished by layering all the elements around the main photograph. By keeping the stamping and die-cutting simple and linear, all the focus stays right where it should be—on the memory! The combination of the clean photo frame, the vibrant rainbow, and the soft vellum creates a perfect balance.


Sunday, 26 May 2024

Azalea card

Hello there,
Welcome to my blog and follow my work on social media.

I am back with another card here using Azalea stamp set and Wooden 3D embossing folder from Altenew. I love this floral set as it has layering images and outline image to colour. I stamped floral outline twice along with some leaves and coloured. I fuzzy cut the images and kept them aside and added embossed background as card base. I finished the card with a sentiment and some embellishments. 


Challenges entered:

Thank you for stopping by and hope you all enjoyed the card.
Stay happy and keep crafting.

Wednesday, 19 July 2023

Layers of love

Hello there,
Welcome to my blog and follow my work on social media.

I was invited as a guest designer for Panda Craft Studio for Jun-July and made 3 projects. Panda craft studio has wide range of tools which are like guide to make boxes, albums and more. They also have double sided paper which are sturdy enough to make albums and boxes. In their website they have a few combo offers too and when it comes to price range, its pocket friendly. 

I have used their new release Heart explosion box big. There 3 layers in this explosion box which can used together or even separately as gift box. This my first layer explosion box else I generally make one layer explosion box. It was definitely fun to make layered box. Below I have pictures of all three layers. Just click on the image and zoom to see the details. I used their newly launched double sided paper pack - Coral blues to make this explosion box. Apart from the pattern paper, I also used contrasting cardstock which compliments the paper pack for die cutting and adding them to the box. I used some element sheets from Die cuts and more to add to the box along with flowers. 


Challenges entered:
https://avenue613.blogspot.com/2023/07/july-2023-anything-goes-w-optional.html

Thank you for stopping by and hope you all enjoyed the project.
Stay happy and keep crafting.

Friday, 12 May 2023

Layout - using dies and critters

Hello there,
Welcome to my blog and follow my work on social media.

For me crafting is therapy. I don't have a plan for layouts or cards and I just go with the flow. I missed my niece a lot and when that happens I end up making a layout with her picture. While browing Instagram, I come across a lot of layout where die cut flowers are used and I thought maybe I could give it a try. When I saw DCAM release a bunch of layering dies, I thought maybe I should give it a try. 

Layering flowers - 1, Layering flowers - 3, Layering leaves - 2, Sparkle burst die with medallion and Stained glass border along with Magnolia delight all from Die cuts and more and I used an old single pattern paper that was a leftover and started layering all the die cut pieces. I didn't have perfect colour cardstock for the dies and hence I inked up all the die cuts and layered them. Finished the layout with some pearls and splattered black ink. 


Challenges entered:

Thank you for stopping by and hope you all enjoyed the layout.
Stay happy and keep crafting.

Tuesday, 28 March 2023

My little sidekick layout

Hello there,
Welcome to my blog and follow my work on social media.

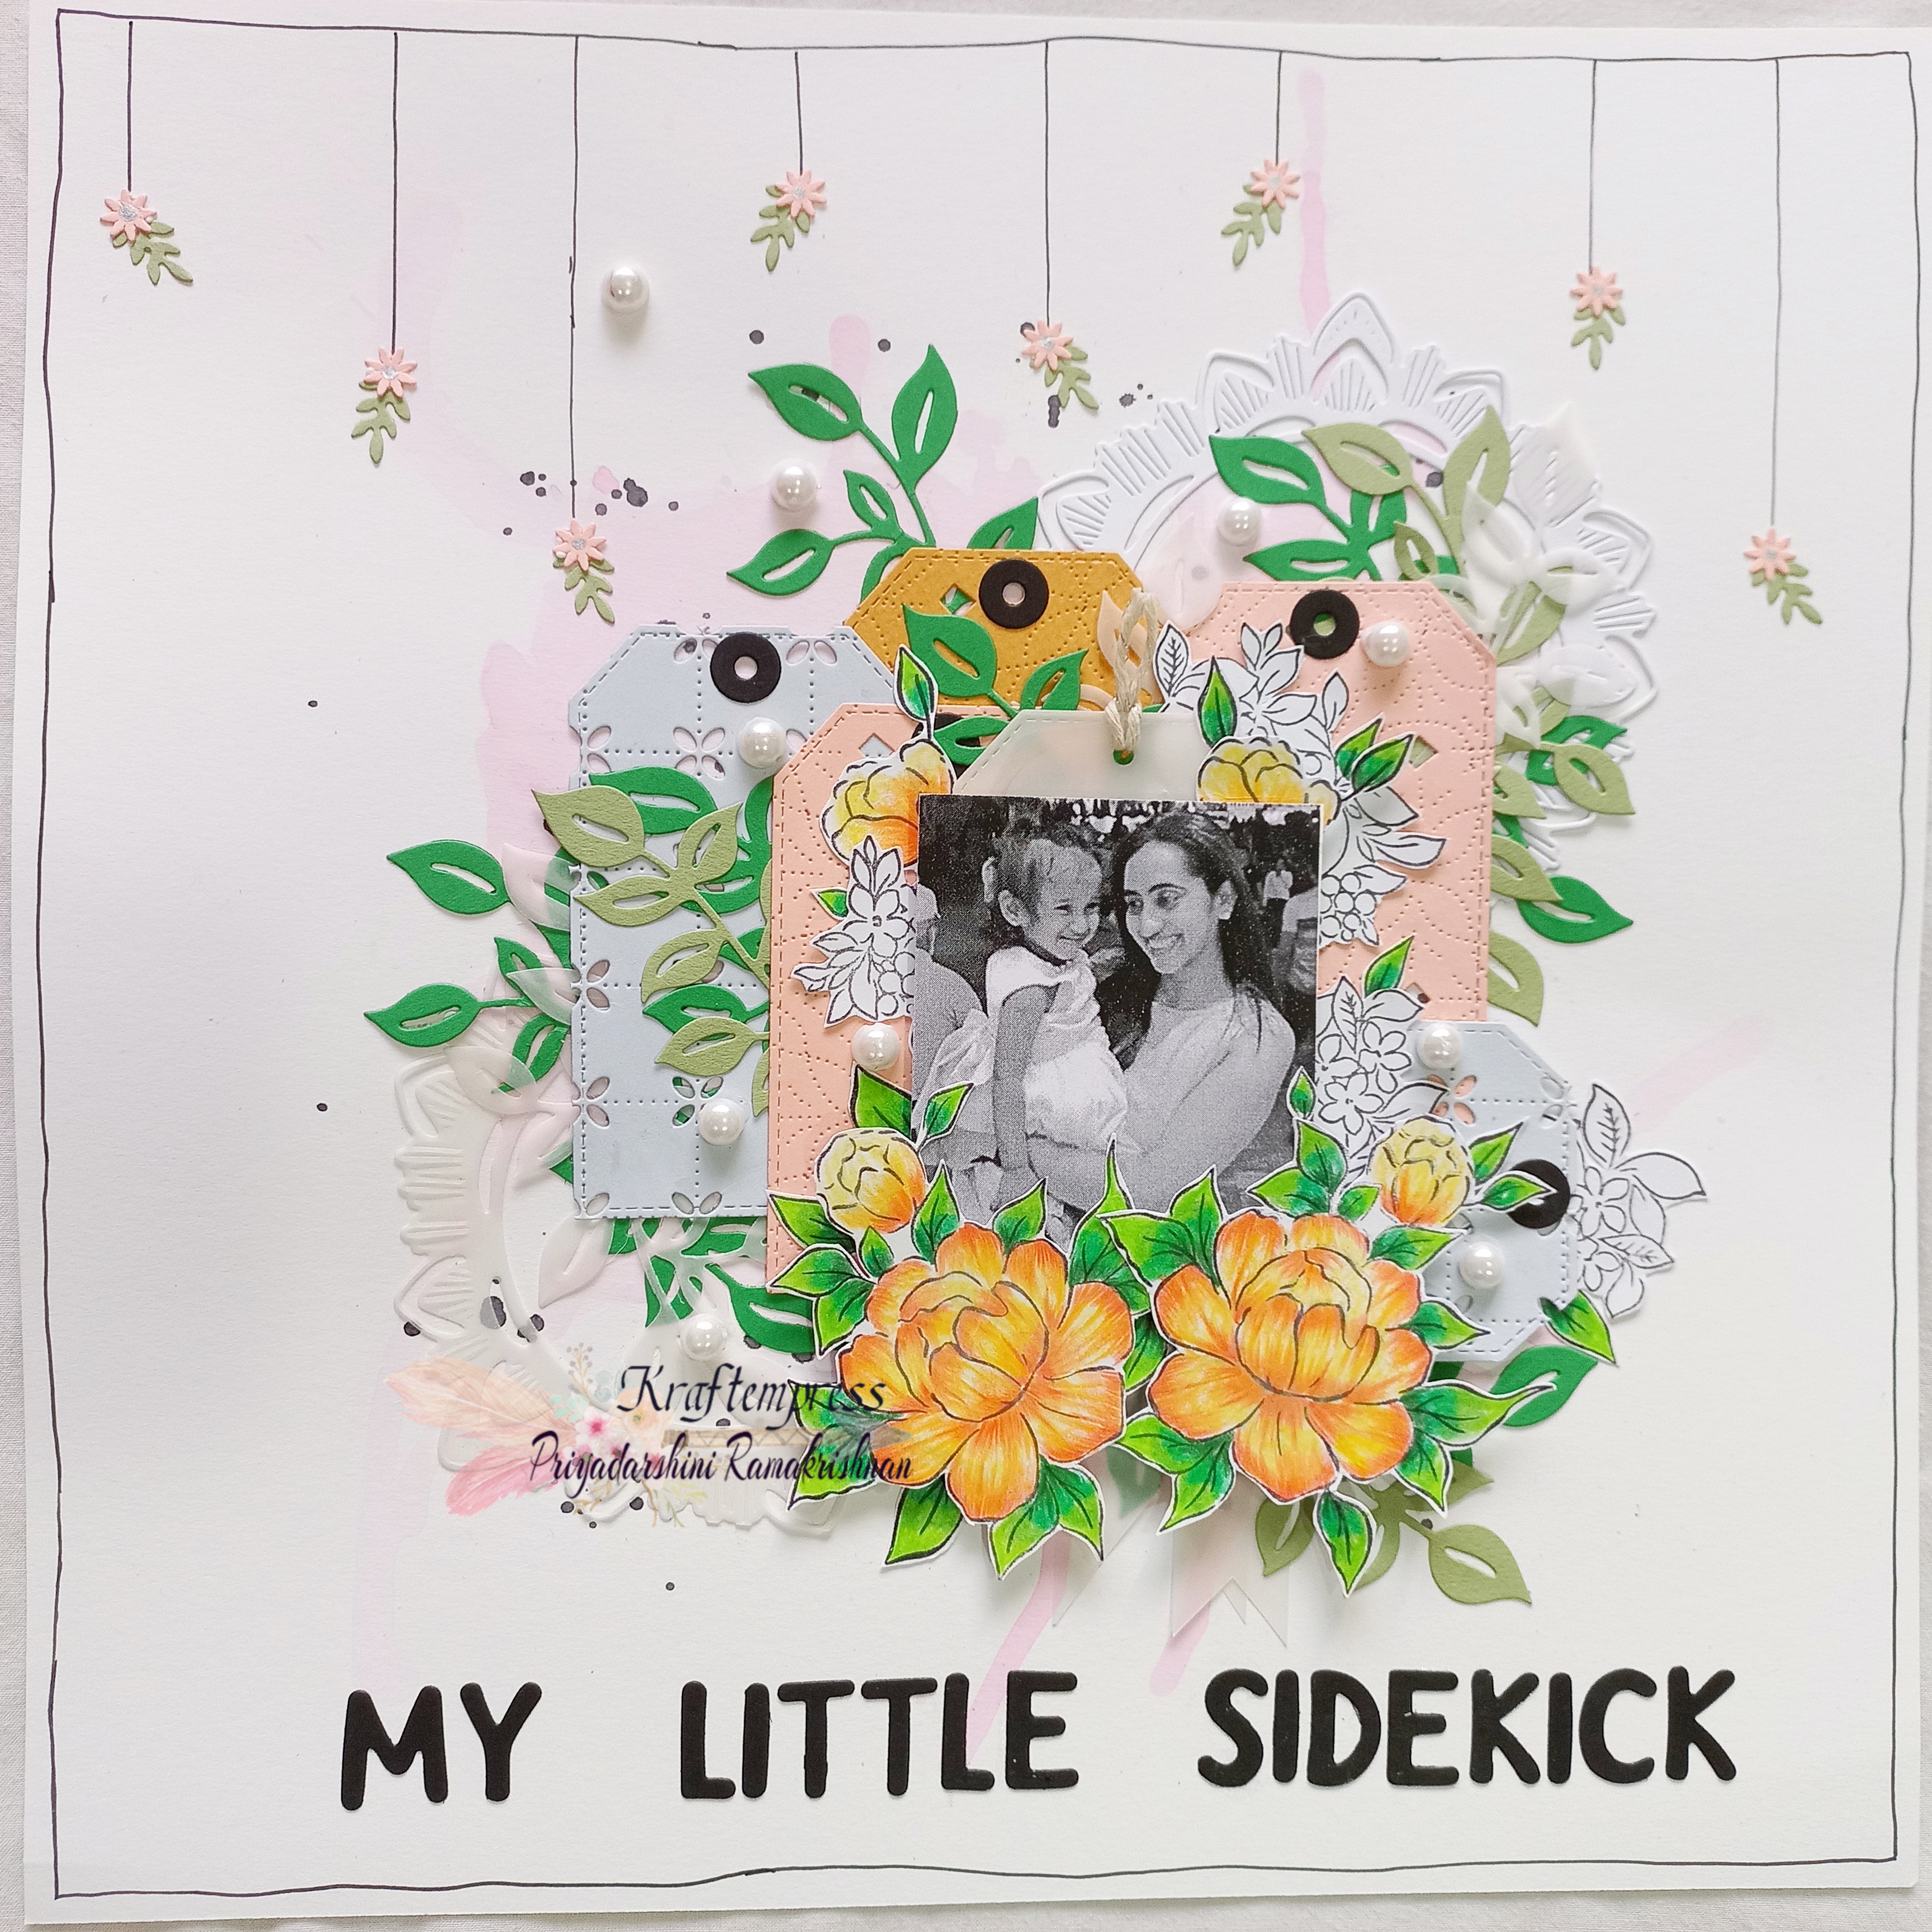
I am here with a layout and I call it My little sidekick who is my cute little niece. She is full of energy and fun and extremely naughty. As an aunt, I love her too much and decided to make a layout using our picture. I am playing with Pink fresh studio monthly challenge and using a products from Pink fresh. I the theme is layers and I have a few layers here stacked up. I used Choose hope, Ornate medallion cover die and Floral grid cover die for giving texture to the die cut tags along with Curvy leaves die and Ornate circle die. I die cut pieces from cardstock and vellum sheet and added my picture and the coloured image and finished the layout with pearls and die cut sentiment. 


Challenges entered:

Thank you for stopping by and hope you all enjoyed the card.
Stay happy and keep crafting.

Monday, 28 November 2022

Mixed media embellishment

Hello there,
Welcome to my blog and follow my work on social media.

I love to use the extras pieces I have saved and kept to make some embellishments which I can use for scrapbooking or to make tags and more. I recently had some transfer sheet images, these super cute nerd animals and made embellishment which I can use for my future projects. I used some scrap pattern paper pieces and some handmade flowers which I had saved and kept, incorporated them into this project. Lots of elements and textures and dimensions I added here. I finished them with a sentiment for each and some pearls. 


Challenges entered:

Thank you for stopping by and hope you all enjoyed the embellishments.
Stay happy and keep crafting.

Sunday, 24 July 2022

'Bloomville' - mixed media layout

Hello there,
Welcome to my blog and follow my work on social media.

I am back with another layout using Bloomville from Mintay papers. I made this layout a while back but I fell ill and couldn't post it and eventually I forget (LOL). I generally buy lose sheets from mintay papers along with coordianting element sheet and then start working on the layout. Mostly when it comes to mintay papers I prefer to make layouts. There are lots of elements here to work with and lots of layers with die cuts, chippies, texture pastes, laces, elements and mulberry flowers. 


Challenges entered:

Thank you for stopping by and hope you all enjoyed the layout. 
Stay happy and keep crafting.

Thursday, 5 November 2020

Diwali theme layout

Hello there,
Welcome to my blog and follow my work on social media.

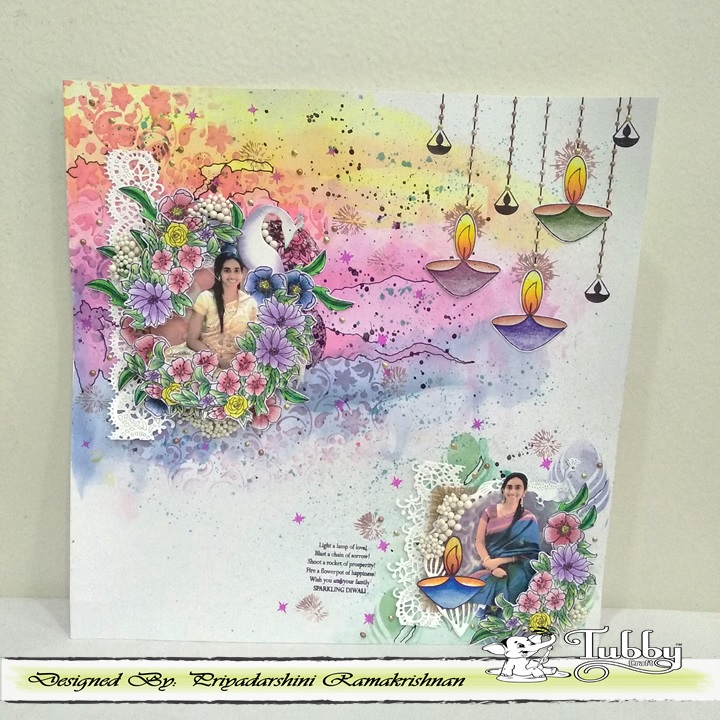
I have a different project this time using stamps, inks and stencils from Tubby Craft. I have used the stamps as embellishments here and the ink pads to create a water colour background. Instead of using texture, I used stencils to create patterns along with some die cuts and burlap. 


I applied a coat of clear gesso on white cardstock and dried with heat tool
Using ink pads, I created a water colour background. I dabbed the ink pad onto an acrylic block and mixed with little water and used a flat paint brush to apply on the card stock. 
I used Foliage 1, peacock feathers and Moroccan tiles stencils to do the stenciling layer. 
I used Diwali wishes, Buttercup and Floral invitaion  stamps to make my own embellishments.
I used some lace dies and peacock dies and started assembling all the pieces together. 


Challenges entered:

Thank you for stopping by and hope you all enjoyed the layout. 
Stay happy and keep crafting.

Sunday, 21 July 2019

One sheet wonder scrapbook and cards

Hello everyone,

Welcome back ...

I am back with another post today and its a video tutorial on how to make a one sheet wonder scrapbook using one 6 by 6 pattern paper and how to use the left over sheets and turn the into cards. For this video I have used papers from Dress my craft called Romantic roses and coordinating motif sheet. And for the sentiment I used all from Mudra stamps. 

I used white card stock for the base and cards. Its a very simple and easy tutorial and more fun to turn the leftover papers and motif images into cards. For the cards, I used Gloria from Le Anns World 101

Video link: https://youtu.be/MfdCDDgM6vM (remember to hit the subscribe button)

Materials used:
1. Pattern paper - Dress my craft Romantic roses 
2. Motif sheets - Dress my craft motif sheet
3. White card stock
4. Sentiment - Mudra stamps
5. Digi - Le Anns World 101 Gloria
6. Scisorrs
7. Adhesive - liquid and double side tape
8. Gem stones
9. Dress my craft - Tag punch
10. Colour pencils

One sheet wonder scrapbook 


Cards


Do not forget to subscribe and follow my blog

Until my next post
Happy Crafting

Monday, 18 June 2018

Beautiful cards for loved ones

Hello everyone,

I am here as DT for Cute N Crafty Mommy. I have used digis from Sprinkle n sparkle JUST A LITTLE NOTE. Its a beautiful digi and I made two cards from it. Its a most beautiful digi I have used. This little girl is pretty and I enjoyed colouring. 


For this card, I duplicated the design and coloured only in the blank space. For the background I used pieces of card stock and adhered it to a grey card stock. 


Follow/subcribe to my one of my social medias (blog,facebook page, instagram)
We have a challenge at our BLOG. 

Submitted entry for https://watercoolerchallenges.blogspot.com/
                              https://a-step-in-the-darkness.blogspot.com/

Thursday, 12 April 2018

Shadow box card picture tutorial

Hello everyone,

I here with an amazing project as a part of DT for Rainbow Craftykari with a tutorial post (link to the blog at the end of the post). Its a very simple and easy project - Shadow box card. The pictures may look a little complicated but its not. It will take only 5 mins to create the box, its that simple and easy.  There is a lot of scope to work here but I have kept mine simple. 


Materials: 
12 x 12 card stock (any colour)
12 x 6 card stock
Martha Stewart score board
Pencil/Pen
Ruler
Adhesive tape & double sided adhesive
The Greeting Farm stamp - Trishell (mermaid), Maisea (sentiment)
Your Next stamp - Fishy fun
Colour pencils
Hero arts ink 
Ink blending tool
Scissors
Clear water droplets

Let's start

1. Take a 12 x 12 card stock. To make it easy, I have marked them A & B.


2. Place the card stock on scoreboard. The card is to be scored at 1",1 1/2", 2 1/2" and 3". This is on all 4 sides of the card stock. No need to crease the scored lines now. 


3. Note this step very carefully. To be marked only on sides marked A..
Mark one inch from the last scored line and two more marks as shown in the picture. 


4. Using a pen/pencil connect these points as shown in the picture.
The sections marked X are to be cut. 


5. After the sections are cut. (Only on sides marked A)


6. Now crease the scored lines and turn the paper over. 


7. Now its time for adhesives. Adhesives to be applied on the outer part of the card stock.


Turn the card stock over and apply adhesive as shown in the picture. This is to be pasted only in the last. Do not paste them before the last step


8. Start pasting sides marked B first. One side at a time. Remove the paper layer and fold the side as shown (half of the scored lines)


The fold will be facing the inside of the card


Repeat the same on the other B side


Now, push the folded sides out. This part makes it easy to fold and paste the other two remaining sides.


9. Repeat the same way of sticking these sides. If you see the picture carefully, I have the side adhesives still intact and yet to adhere them. 


10. This is the final step to make the shadow box. Remove the upper paper on all sides and push all the sides together in to create the box


11. Score the 12 x 6 card stock in half to create a 6 x 6 card. 


Adhere the card to the back of the shadow box


12. To decorate my shadow box card, I used stamps from The Greeting Farm and Yours Next Stamp. I stamped all the images on ninah white card stock and coloured them using colour pencils. 

First, I used some yellow ink from hero arts to add some highlighting behind the mermaid and adhered the mermaid using double sided adhesive to give dimension. 

I used normal liquid adhesive for the rest of the images. I added some clear water droplets to give bubble effect. 


I kept the inside of the card simple as well. Just added a fish and a turtle with a simple sentiment from Yours next stamp. 


I hope the tutorial was useful and fun. 
Do visit Rainbow Craftykari store HERE
Visit our BLOG for more inspiration, tutorials and challenges

Happy crafting