Showing posts with label tubby craft. Show all posts

Monday, 10 July 2023

Roseate birthday cake topper

Hello there,
Welcome to my blog and follow my work on social media.

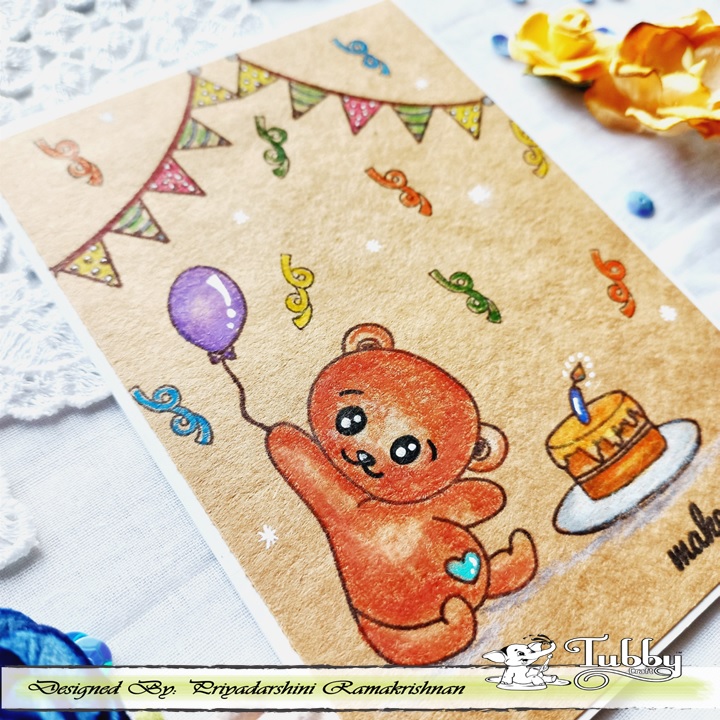
I am here again with a birthday cake topper where I made DIY pattern paper using stencils and ink pads from Tubby craft. Its super fun to make something different as a cake topper or embellishment. Its so easy to make and I used coloured cardstock to stencil and scroll down to see. Though its not shown much in the picture, it looks so beautiful in real. To add some more to the roseate, I added stamped and coloured cake image and some die cut leaves and flowers. The same roseate can be used on various projects like to make small embeliehsments or ATC or to decorate albums or even cards.. 


Challenges entered:
https://lovetocraftchallengeblog.blogspot.com/2023/07/ltccb-75-anything-goes-ltccb-74-winner.html

Thank you for stopping by and hope you all enjoyed the card.
Stay happy and keep crafting.

Wednesday, 6 July 2022

RAWR by hello

Hello there,
Welcome to my blog and follow my work on social media.

I am back after a break. I was unwell and it took me a while to get back on my feet and starting working on cards. I have a clean and simple dino card using Dinosaur and friends from Tubby Craft. I started working on kraft cardstock these days and love using prisma colors on them. They give a beautiful effect on kraft paper and the result is different. The card is super simple with focus on the dino and I added a palm tree behind him along with some clouds and a butterfly on his tail. I also added a border and a sentiment to finish the card. 


Challenges entered:
https://creataliciouschallenges.blogspot.com/2022/06/challenge-238-anything-goes-with.html

Thank you for stopping by and hope you all enjoyed the card.
Stay happy and keep crafting.

Wednesday, 8 June 2022

Beary birthday wishes

Hello there,
Welcome to my blog and follow my work on social media.

I am back with some fun birthday cards. We at Tubby Craft have a ton of stamps and stencils that can be worked for birthday cards and today, I decided to use Make a wish which has super cure bear images and other elements to work along. Along with this stamp set, I also used Beary wishes from which I added the confetti and stars and Jet black and Chocolate brown ink.


My first card is working on kraft cardstock and this can be made as a one layer card too
I chose one bear image, cake, balloon and the banner and stamped them all using Chocolate brown ink. 
I used prisma to colour the images and a white gel pen to add some details.
I kept the card very simple and added some confetti from Beary wishes stamp set
I finished the card with a sentiment


My next card is a slimline card and my focus is on the three bear images from the stamp set
I stamped, coloured and fuzzy cut the bears and kept them aside
I die cut three circles from pastel sheet of paper and added them to the cardstock
I stamped the rest of the images from the set using Jet black ink
I kept these images just like that so the focus stays on the bear
Finally, I added a frame and some stars and confetti from beary wishes stamp set
Finished the card by adding a sentiment


Challenges entered:

Thank you for stopping by and hope you all enjoyed the card.
Stay happy and keep crafting.

Monday, 23 May 2022

Mask off technique

Hello there,
Welcome to my blog and follow my work on social media.

I am back with another set of cards and this time I made them using masking technique. They are easy and simple ones to make with or without masking paper, these cards can be made. All 3 cards have floral elements and with a lot of inking. All these cards can be made even as a one layer card. For the cards, I am using all products from Tubby craft and you can check out the link HERE


Card 1 - Making using washi tape


For the first card, I used Lemon yellow and Imperial read ink
I used washi tape to mask off vertically and add the colours from both the sides. 
I used blending brushes from Tubby craft
I kept shifting and moving the washi tape to get a striped inked background on one side
After the ink is completely dry, I stamped Plumeria on either side and added a sentiment
To finish the card, I added some gemstones and added the piece to a top fold notecard. 


Card 2 - Masking using negative space


For the next card, I took a piece of masking paper and die cut 3 sizes of circles randomly.
I used the negative space of the masking paper here and inked all the 3 die cut parts using Emerald ink, Imperial red and Hot pink
While inking, I kept one side darker and lightened it as I went by
After the inks were dry, I stamped the images from Bright day and added a sentiment from Fancy sentiments
I added some gemstones and finished the card by adding it to a top fold notecard.


Card 3 - making with stencil

For the final card, I used the die cut masking paper which I did earlier and added that to a white cardstock.
I added the masked die cut pieces randomly on the card stock and inked with Turquoise, hot pink and Imperial red
Keeping the masked pieces there, I used striped stencil to add more interest to the card
I turned it diagonally and inked using the same colours again.
Then, I stamped the images from Bright day and floral peony and added some colour to them.
Finally, I added a sentiment and some gemstones to finish the card. 


Thank you for stopping by and hope you all enjoyed the card.
Stay happy and keep crafting.

Tuesday, 10 May 2022

Card for mom

Hello there,
Welcome to my blog and follow my work on social media.

Mom is always special and she deserves to have a day dedicated to her where we can pamper her and shower her with extra love. For that special person, I have a simple card using Floral peony from tubby craft to celebrate mothers day and added a diecut MOM and added a sentiment how she inspires us. 

The card is very simple and I coloured the flower with alcohol markers and blended two shades of colours and did the same for leaves as well. To add some interest, I added some white dots using gel pen. I die cut the letters for MOM and added some dashes and a sentiment on top of it. I finished the card with some embellishments and added it to a  white top fold card. 


Challenges entered:

Thank you for stopping by and hope you all enjoyed the card. Stay happy and keep crafting.

Monday, 18 April 2022

Baby card

Hello there,
Welcome to my blog and follow my work on social media. 

Of late I am trying to create a scene using stamps I have, especially the ones that have cute images. I selected one such image with a baby in a box and decided to work around the image by creating a cute little scene. The image I am using here is from Tubby craft and the stamp set is called Baby in a box along with a couple of inks. I did a lot of stamping and masking as I had to add toys and make the wall. 


First I placed the baby toys and positioned the images and stamped them on white cardstock and on masking paper. I fuzzy cut the masking paper and then stamped baby in a box. I took a pencil and drew the window with curtains, clock and a wall picture, I masked out all the images and mildly inked with Aqua blue ink.  I added a scenery outside the window and then added the curtains. I added some design to the wall paper using blue ink. I coloured all the images and finished the card with a sentiment. 


Challenges entered:
https://polkadoodle.blogspot.com/2022/04/wk-16-card-making-crafting-challenge.html
https://digichoosday.blogspot.com/2022/04/wk-15-anything-goes-card-making.html
https://craftycatzweeklychallenge.blogspot.com/2022/04/crafty-catz-591-anything-goesapril.html
http://wordartwednesday.blogspot.com/2022/04/anything-goes-weeks-539-540.html
http://qkrstampede.blogspot.com/2022/04/qkr-stampede-challenge-442.html
https://jansdigistampschallenges.blogspot.com/2022/04/april-2022-always-anything-goes.html
https://creativefingerschallengeblog.blogspot.com/2022/04/challenge-229.html
https://pinkgemchallengeblog.blogspot.com/2022/04/wk-8-card-making-craft-challenge.html
http://lilpatchofcraftyfriends.blogspot.com/2022/04/180-all-dressed-up.html
https://creataliciouschallenges.blogspot.com/2022/04/challenge-233-anything-goes-with.html
https://ikesworldchallengeblog.blogspot.com/2022/04/ikesworld-challenges-155-anything.html
https://crafterscafeblogchallenge.blogspot.com/2022/04/284-15-april-new-baby.html
https://blog.dare2bartzy.com/april-challenge-kids/
http://welove2create.blogspot.com/2022/03/wk-4-craft-card-making-scrapbooking.html
https://colourcrazychallenge.blogspot.com/2022/04/week-15-anything-goes-colouring.html
http://ttcrd.blogspot.com/2022/04/anything-goes-challenge-april-12th-2022.html
https://heroarts.com/blogs/hero-arts-blog/stay-crafty-with-a-blog-named-hero-april-challenge

Thank you for stopping by and hope you all enjoyed the card.
Stay happy and keep crafting.

Friday, 8 April 2022

Its a pearl

Hello there,
Welcome to my blog and follow my work on social media.

Pearls are known as queen of gemstones. I remember when I got a pearl a while back, I was in a shop in US and the shop keeper told me to choose an oyster and she cut it open in front of me and it was a mild pinkish white pearl. It was so pretty and I cherish it a lot. 

I decided to make a card and create an underwater scene using oyster with a pearl from Precious treasure stamp set and sentiment from Best fishes which is from Tubby craft. 


I started with first stamping the oyster on white card stock and the same on masking paper. 
I did a close fuzzy cut on the masking paper and added that on the stamped image.
I used Aqua blue ink to mildly ink the top of the card stock for the sea and then I added some interest using alcohol markers and pencils. 
For the sea bed, I used colour pencils and added some dots using alcohol markers
Using alcohol markers and pencils I added some sea plants and for the seaweed, I used the image from Best fishes and used Lawn green ink to stamp and added interest with pencils. 
I added one fish and coloured it. Best fishes has some bubbles too, which I added to the cardstock using Turquoise ink. 
I finished the card with a sentiment and added it to a top fold note card. 


Thank you for stopping by and hope you all enjoyed the card.
Stay happy and keep crafting.

Tuesday, 8 March 2022

Card for Women's day

Hello there,
Welcome to my blog and follow my work on social media.

Today is all about celebrating womanhood globally. I grew up surrounded by strong women, I realized we are the strongest and we make a change. My grandmothers were married off at a young age and I am talking about 1940/1950, where it is a social norm to get married and have children. Both my grandmas had children after 4 years of their marriage since they felt that completing their education was the first priority.  Even after finishing their schooling and having children, they continued to study and well-versed in various languages. My mother grew up in such an environment and she was working as a banker when she met my dad. 

After having my brother and me, she felt empty and decided to do something for herself. She joined a few NGOs and started educating under privileged children, host blood donation camps and teach women the importance for having a voice.  She inspired me so much, that when I started working I had to do something and sponsored a few girl children for their education and I am still doing that and the best is my husband supports me in this. 


With this being all said, I am sharing two cards to celebrate Women's day along with Tubby Craft. each card is made differently and has a interpretation as well. Each of us are unique and we need to embrace that happily. 


Card 1


My first card is a simple one using Bloom stamp set, Dot illusion stencil and sentiment from Special day greetings stamp set. 
I stamped the image on white cardstock and coloured it with pencils. 
I stamped the image again on masking paper so I can stencil around the image.
I added the masking paper and used dot illusion stencil and used Lavender violet ink to stencil. 
Using Jet black ink, I added the sentiment and some pearls to finish the card. 


Card 2


This is a super fun card I made and I used Vintage wishes stamp set, Aqua blue ink for the sky and sentiment from Bloom. 
I stamped the girl from the stamp set and coloured her.
For the background, I used alcohol markers and colour pencils together to create a meadow and tree. 
I mildly inked the top of the cardstock with Aqua blue ink and added details to the tree and grass. 
I added a sentiment from Bloom stamp set and added it to a top fold note card. 


Challenges entered:
https://hereisaplacetostart.blogspot.com/2022/03/challenge-032022-march-2022-anything.html
https://craftinghappinesschallenges.blogspot.com/2022/03/121-march-anything-goes-always.html
http://wordartwednesday.blogspot.com/2022/03/weeks-533-534-anything-goes.html
https://craftycatzweeklychallenge.blogspot.com/2022/03/crafty-catz-585-cas.html
https://digichoosday.blogspot.com/2022/03/card-making-crafting-and-papercrafting.html
https://polkadoodle.blogspot.com/2022/03/card-making-crafting-challenge-wk-10.html
https://colourcrazychallenge.blogspot.com/2022/03/week-9-anything-goes-colouring.html
http://ttcrd.blogspot.com/
http://qkrstampede.blogspot.com/2022/03/qkr-stampede-challenge-439.html
https://jansdigistampschallenges.blogspot.com/2022/03/march-2022-always-anything-goes.html
https://creativefingerschallengeblog.blogspot.com/2022/03/challenge-226.html
https://pinkgemchallengeblog.blogspot.com/2022/02/card-making-craft-challenge-anything_01766709923.html
http://lilpatchofcraftyfriends.blogspot.com/2022/03/c-177.html
https://creataliciouschallenges.blogspot.com/2022/02/challenge-230-anything-goes-with.html
http://abitmoretimetocraft.blogspot.com/2022/02/a-bit-more-time-to-craft-15th-februarys.html


Thank you for stopping by and hope you all enjoyed the card.
Stay happy and keep crafting.

Monday, 14 February 2022

One layer love card

Hello there,
Welcome to my blog and follow my work on social media.


Working my way with colouring and having fun in stretching my stamps to make cards. I have this gorgeous Toucan bird flying by and say I love you. Toucan is from Bird get well soon stamp set from Tubby Craft stamps and I coloured using pencils on kraft cardstock. I practise colouring a lot these days and having too much fun. Colouring on kraft cardstock was amazing and I think, I will try doing that more. 

You can check out the quick colouring process in the link above.....


Challenges entered:


Thank you for stopping by and hope you all enjoyed the card.
Stay happy and keep crafting.

Wednesday, 9 February 2022

Valentine rose card

Hello there,
Welcome to my blog and follow my work on social media.


Today I will be sharing 2 cards for Valentine's day where I will be using roses to make the cards. "A bit of fragrance always clings to the hand that gives your roses". Tubby Craft has a range of stamps for Valentine's day or any occasion, so remember to check out the site. 

Card 1


My first card is a bunch of roses from Love Roses stamp set. 
I stamped the flowers, buds and leaves on white cardstock and coloured with pencils.
I used orange and yellow for the roses and green with brown for the leaves
I fuzzy cut all the coloured images and kept them aside. 
I took a white cardstock and splattered some black ink and let it dry completely.
I added vellum die cut leaves and started layering the roses one on top of the other.
I added some pearls for embellishment and a sentiment to finish the card


Card 2


This is a traditional Valentine card with pink roses and a sentiment. 
For this card, I used Layered roses stamp set and sentiment from Special day greetingsThese two stamp sets are a wonderful combination as you can make tons of cards for various occasions.
I did not have any plan to go about with this card and just went with the flow and did a lot of masking
I started stamping the solid roses using Light pink ink and stamped the same on masking paper
For the next layer I used a darker shade, Raspberry
I masked the roses and stamped the leaves next, Lawn green used for the solid leaf and Emerald green for the next layer. 
I added some pearls and added a sentiment to finish the card. 


Challenges entered:

Thank you for stopping by and hope you all enjoyed the cards.
Stay happy and keep crafting.

Tuesday, 25 January 2022

'Plumeria' floral cards

Hello there,
Welcome to my blog and follow my work on social media.

I am happy to be back on Tubby Craft blog and this time I am using Plumeria florals stamp set. I wanted to use it for a while and finally I was able to do it and now this has become my all time favoutite floral stamp set. I love the floral here and the opportunity I get to practice colouring is brilliant. I made 3 cards for today and I had to make the tough decision to stop making cards with this stamp. I love it so much, I wanted to make more and decided to use them later for other cards. 


Card 1


This is my first card using Plumeria and I did some masking to make this card. 
I stamped the image first on one corner of the white cardstock and stamped the same on masking paper. I masked the stamped part and stamped the image again on the other side. 
I masked both the florals and inked using Light pink ink. I removed the masking paper and coloured the images. 
Since Tubby dye inks react to water, I dabbed some jet black ink on an acrylic block and added some splatters. 
I added some pearls, liquid pearls to the flower center and finished with a sentiment. 


Card 2


Moving on my next card, this is also a simple card and the focus stays on the image. 
I took a white cardstcok and stamped the image on two diagonal corners and coloured with alcohol markers.
I used my white gel pen to add some details to the coloured image and added a gemstone to the center of the flowers. 
I used Mustard yellow and chocolate brown ink to add some splatters to the card base. 
I added a border using black pen and finished the card with pearls and sentiment. 


Card 3


Here is my final card and its a monochrome card.
I stamped the image with Aqua blue ink and coloured shades of blue and fuzzy cut it. 
I took a white cardstock and used Chinese blue and Sapphire blue ink to Checkered stencil.
I used dark blue ink here because I was going to add a piece of vellum. The vellum helps in making off the brightness of the background and helps the image to pop up. 
I added the image and some pearls
I stamped the sentiment with Sapphire blue ink and added it to the notecard.