Sunday, 30 September 2018

Card for a friend

Hello,

I am Priyadarshini here with another card for Le Anns World 101 using image Pete.
The card is a CAS card as usual and I had lots of fun colouring him and turning him into a card for a friend. I used 2 sets of colour pencils here to show the difference in the quality and used 110 lbs niniah white card stock. 


I did a lot of layers using pattern paper and added a sentiment vertically on a oval die cut vellum. I used polychromos colour pencils to colour him.


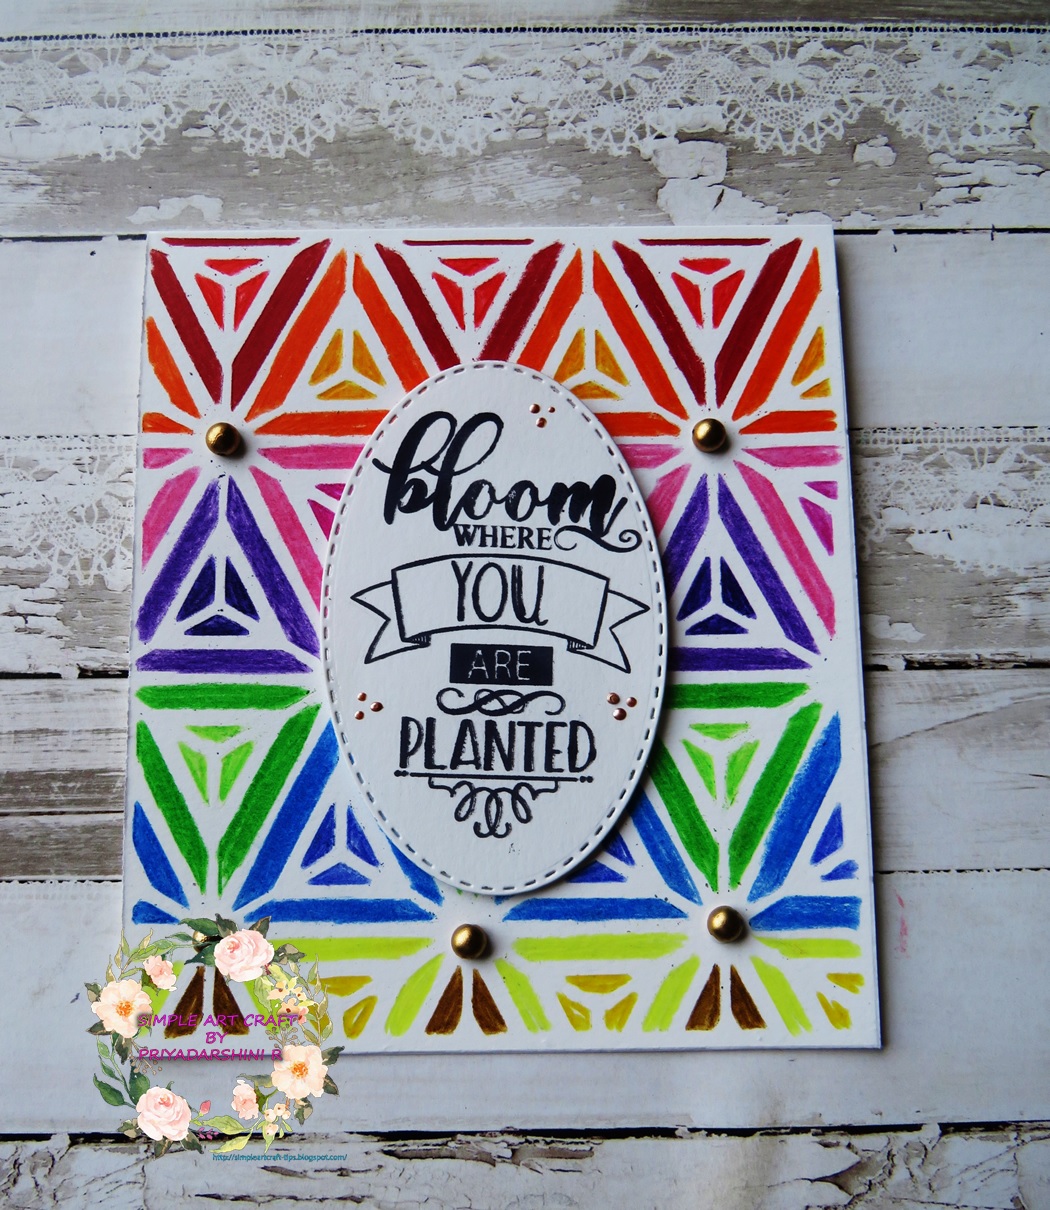
My second card, I coloured with simple colour pencils from Faber Castell. Made a kind of sketch here by adding 2 strips of colour paper on the back and a piece of pattern paper and vellum piece. To finish the card, I added a sentiment. 

I hope you enjoyed the card.
Do join us in our facebook group to take part in our progressive challenge.

Happy crafting

Saturday, 29 September 2018

Subtle coloured card

Hello,

For today's post I am using a sketch from CAS-ual fridays challenge and Colour my heart colour dare challenge. I decide to link the sketch and colours to make a beautiful floral card using Floral motifs stamp set from Altenew. Altenew has wonderful range of floral stamps and they work perfectly for such cards.


For this card, I kept the colours very subtle and light. I used some pattern papers as per the sketch. 
I stamped and coloured with colour pencils (I prefer pencils as I feel I can control the colouring). I added a white pearl to the center of one flower to give a little effect. The liquid pearls I used a colour similiar to the flowers. 

Link to the challenges are provided below along with the sketch and colour palette. 

--------------------------------------------------------------------------------------------


Colours I choose from this tic-tac-toe is sugarplum,white daisy and glacier

-----------------------------------------------------------------------------------


I hope you all liked my card.

Happy crafting. 

Friday, 28 September 2018

CAS card using sketch

Hello,

This post I am using a sketch from Freshly made sketches and stamp from Simon says stamp
This is one beautiful flower stamp set and love colouring this image. 


IMG_20180928_154204

I stamped and colored using colour pencils. I cut the image into 3 equal pieces and added a black card stock behind it. I used a piece of vellum behind these pieces (horizontally) and added the sentiment with some liquid pearls to finish the card. 

Sketch I used:


FMS Final 356-001
Challenges: 
  1. Simon says stamp
  2. Freshly made sketches
Happy crafting

CAS card using sketch

Hi,

For this post, I made a card using floral stamps from Simon says stamp. To make this card, I used a sketch from CAS(E) this sketch #291. 

IMG_20180928_154534 (1)

I kept the colours monochrome (shades of blue) and added some some pearls and sentiment to finish the card. 

The sketch I used :
CTS_291

Challenges: 
  1. Simon says stamp
  2. CAS(E) this sketch

Happy crafting

CAS fun card

Hello,

I am sharing a CAS card using image from Le Anns World 101. I used colour pencils to colour her turned it into a card. 
IMG_20180928_163758
Le Anns world 101 has some wonderful and amazing digis. It is so much fun to make cards using her designs. To finish the card, I added a pattern paper and vellum behind the image. I didn't align them but kinda made these papers slanting for a different look.  

Challenges: 
  1. The Paper shelter
  2. Lemon short bread
  3. Crafting with an attitude
I hope you all like my card.

Happy Crafting

Colours of Autumn card

Hello,

I am sharing a beautiful card with Colours of Autumn. I have used an image 'The forest princess'  from The Paper Shelter one of my favorite digital stamps company. 


IMG_20180928_163901_1

The colours I choose here are orange, yellow, green and burgundy. Love these colours on this image. 
I added some pattern paper on the background and used nuvo pearls to finish the card. 

Challenges: 

  1. The Paper shelter
  2. Lemon short bread
  3. Crafting with an attitude
  4. Sum more fun
  5. Colour crazy challenge
  6. Addicted to stamps and more
  7. Your next stamp challenge
I hope you all like my card.
Happy Crafting

Tuesday, 25 September 2018

CAS floral card using a sketch

Hello,

I made a CAS floral card using flower stamp from craftyscrappers and sketch from CAS(E) this sketch


I stamped, coloured and fuzzy cut the image. For the horizontal strips, I used 2 colous from my old card stock pieces I saved. I added the sentiment and liquid earls to finish the card. 

Challenges:

Hope you liked my card.
Follow my blog for more card fun

Happy crafting


Stenciling techniques

Hello,

I am here for Craftyscrappers DT and have an easy stenciling tutorial. I have used 2 stencils from Craftyscrappers and the technique is super easy. I have a link to the video post as well. 


Video link:  Stenciling technique tutorial video


Card 1


  1. I took 4 different shades of gray colour inks from Altenew
  2. I secured my stencil to the card stock.
  3. Using ear buds, I started adding colour to the stencil. I went by randomly adding colour to give each design in the stencil highlights.
  4. I stamped and coloured the butterfly
  5. I die cut the stencilled piece and added the same to a circle vellum piece
  6. I added the butterfly to the stencilled circle and stamped some little butterflies and sentiment.
  7. To finish the card, I added some embellishments.
Tips
  • Tracing paper can also be used as an alternative or vellum IF only being used for backgrounds.
  • This technique using ear buds works well for stencil which has intricate design as well as large designs.
  • Dye inks works best for this technique
Card 2


  1. I secured the stencil to the cardstock
  2. Since I am using colour pencils for this technique, I keep them sharp.
  3. I chose rainbow colour and started randomly adding colour
  4. Here, I used polychromos pencils
  5. I took 2 shades of each colour for this technique.
  6. Once I am done colouring, I added an oval die cut with a sentiment to the center of the card
  7. To finish it, I added some half dull gold beads.
Tips
  • Any colour pencil works for this technique
  • Any stencil design works for this technique.
  • Best technique for one-layer card
  
Card 3


  1. For this card, I did regular stenciling using Altenew inks
  2. I stamped my favourite image and coloured her.
  3. When I fuzzy cut this image, I left some gap from the image and added a black outline using alcohol markers.
  4. I added the sentiment and liquid pearls to finish the card.
Tip:
  • Black stock can be used instead of alcohol markers as outline
  • This technique is best for one-layer card.

I hope you all liked my card


Happy crafting

Saturday, 22 September 2018

Tag card

Hello everyone,

I am here with a new card post and I call it a tag card. I have made a tag card previously (will link that post below) but this is totally different from the previous one. You might wonder how this tag card works. Its a side fold square card and the tags are placed in the front of the card and they are removable. You can write a sweet secret message in these tags. 


IMG_20180922_184131 (1)

The image I used here is from The Paper Shelter (one of my favourite digital stamps) and the image I used is called Brave and Cute Knight (it is very cute and loved colouring him and I call him Edward the Knight :)).

How did I make this card:

  1. I coloured and fuzzy cut the image. Then, die cut a vellum piece (tracing paper works instead of vellum for die cutting a circle) and added that to a pattern paper.
  2. I used another pattern paper for the background.
  3. I added a piece of embossed cardstock horizontally in the front of the card using foam adhesives. 
  4. I added my image to the front, in the middle so I have space to add my sentiments. I stamped 2 sentiments here, one is 'Be brave, be happy' (on white card stock) and the other directly which says happy birthday knight.
  5. I made 2 pieces of tags (more can be added here as me have enough space)
  6. I added the front piece to the card base and place the tags behind the image so they can be removed. 

Submitting this card to the following challenges:
  1. Addicted to stamps
  2. Heart craft paper
  3. a bit more time to craft
  4. lemon short bread challenge
  5. Crafting with friends
  6. Angie digital stamps
  7. artistic inspirations challenges
  8. qkr stampede
  9. Sum more fun
  10. colour crazy challenge


I hope you all liked my card. 

Link to my other tag card: Tag card (different from this one)


Happy crafting

Friday, 21 September 2018

Card using sequins

Hello,

I am here with a different card pattern using sequins. Its super easy and a cute card to make. I enjoyed making this card. 


Untitled


I used stamp and sequins from Craftyscrappers and colour it. Then I drew a light circle outline (used my circle die for it) and started adding the sequins along the circle. 

I added the butterfly using double sided foam adhesive to give some dimension. I added this to a square piece of pattern paper and added it to a top fold note card. 

To finish the card, I added a sentiment and some liquid pearls.

I am submitting this card for 2 challenges (mentioned below)------


#124a


35053892_1881752338515574_4237111007031328768_o
I hope you liked my card

Happy crafting

Sunday, 16 September 2018

Inspiration post for floral & textures

Hello,

This is an inspiration post for  Craftyscrappers. This month we have a new challenge with theme 'Floral & Textures' at our blog. So my post for today is going to show 4 cards with this theme. This theme has endless possibilities with cards, mixed media, scrapbooking, tags, etc.. 


Materials used:

1. Craftyscrappers
    a) STAMPS
        i. Life quotes
       ii. Sending Hugs
      iii. Hello sunshine
   b) STENCILS
       i. Distress circles
      ii. Dahlia flowers
     iii. Bricks
      iv. Diamond Pattern
       v. Abstract stars
      vi. Honeycomb
  c) PASTES
      i. Dazzle paste - Orchid, Fog
     ii. Shimmer paste - Martina
2. Altenew inks 
   a. Lavender fields
   b. Frayed leaf
   c. Jet black
   d. Evening gray
   e. Buttercream
   f. Coral berry
   g. Bamboo
3. Spellbinders circle die & square die
4. White card stock
5. Liquid pearls
6. Sequins
7. Vellum
8. Colour pencils
9. Embossing paste
10. Foam flowers
11. Double sided adhesive

Lets go to my cards...........


CAS one layer card


This is my first car, a single layer card using our new release Hello Sunshine stamp set and bricks stencil. 

Its a 5 x 5 card and I stamped the floral image on the corner of the card and coloured with pencils. 
I randomly added the stencil on the background along with a sentiment. 
To finish the card, I added some liquid pearls. 


Stencil highlighting


For my second card, first I used some embossing paste using honey comb stencil for the background and let it dry. 

Then I used Dahlia flowers stencil, I used coral berry ink for the flower and bamboo ink for the leaves. 
I used some colour pencils, to highlight and give some shade to each petal in the flower and leaves.
I worked my way from dark to medium for colouring. I put together the flower and leaves and added some liquid pearls to finish the card. 

(This technique works with any stamp floral, abstract, etc....)


Stamp highlighting


For the next card I am focusing on stamp highlighting. 

I used script stamp from Hello sunshine stamp set for the background where I repeatedly stamped it on the background using evening gray inks. 
I die cut a square and did some stenciling using distress circles and added the sentiment and added this to a vellum square sheet. 
I stamped the flowers and leaves from Sending hugs stamp set using lavender fields and frayed leaf for leaves.
I used colour pencils to highlight the flowers and some of the leaves. (I didn't highlight some of the leaves as my main focus is on the flowers)
I added some flower sequins to finish the card.

(Tip: This technique works only with solid flower stamps)


Texture background


My last card is here where my focus is on some texture using stencils and pastes. 

For the background, I used diamond pattern 2-in-1 stencils and Orchid dazzle paste and Martina shimmer paste (I used heat gun to dry it).
In a piece of card stock I used Abstract stencil with Fog dazzle paste and circle die cut and added a piece of vellum on top of the die cut.
I added the sentiment on the vellum piece.
To make this card more better, I added foamiran flowers on one side of the circle.
I used double sided foam adhesive to add this card piece to the stenciled background. 


There is endless possibility with this theme. 


Check out Craftyscarppers BLOG for more inspiration by our creative/design team members. 


Challenges:

1. CAS on Sunday
2. Create and inspire challenge
3. a bit more time to craft
4. creative fingers challenge
5. creatalicious challenges
6. crafty gals corner challenges
7. lets create challenges
8. not just cards challenges
9.  the paper shelter
10. addicted to stamps challenge
11. parus card making challenges
12. crafting by designs
13. cute card thursday
14. the flower challenge
15. pile it on challenge
16. through the craft room door
17. a perfect time to craft
18.  crafty creations challenges
19. love to scrap challenge blog
20. crafting-with-friends
21. heart craft paper
22. simply less is moore
23. lil patch of crafty friends
Happy crafting


Monday, 10 September 2018

CAS flower card

Hello everyone,

I have made a CAS flower theme card for this post. I used ready to colour motifs from Die cuts and more. I used mint colour for the flower and added some leaves to them. I did not colour the leaves to give it a different look. I added the flower and leaves to a circle die cut (vellum and white card stock) and added a sentiment. To finish the card I added some copper liquid pearls.


I am entering this card in the following challenges:
6. a perfect time to craft
7. crafty creations challenges
8. love to scrap challenge blog
9. crafting-with-friends


Happy Crafting

CAS card with a cute image

Hello there,

I am here with a project for Le Anns World 101 using Dragon rider image. Its a CAS card using the image and pattern paper. 


*

I printed the image and colour with polychromos pencils. These are the best pencils for colouring as they blend really well. 

I fuzzy cut the image and added it to a pattern paper (this is a ombre pattern paper and I felt this colour went well with the image). 

I added some liquid pearls and a sentiment o finish my card. 

Visit Le Ann's World 101 shop to find this digi and more HERE

Happy crafting